The ocean’s vast and unpredictable beauty has inspired countless photographers to capture its essence. Whether you’re a seasoned photographer or just starting out, mastering ocean photography techniques can unlock the potential to create stunning images that do justice to nature’s grandeur. This guide delves into the essential strategies and tools needed to excel in beach and underwater photography, offering actionable advice for both newcomers and enthusiasts alike.
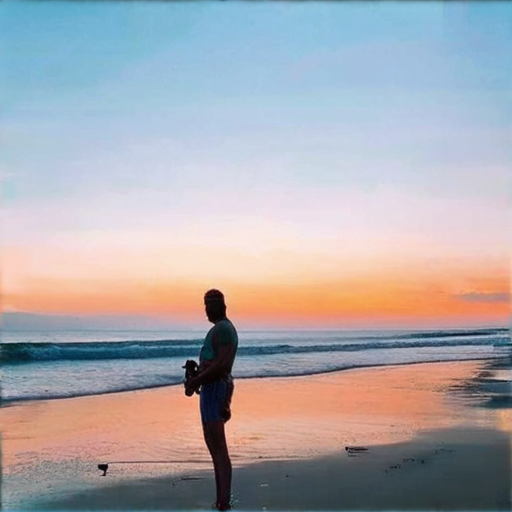
How to Take Good Pictures of the Ocean
We’ve got you covered with expert tips to capture stunning ocean photos that showcase its beauty and power.
Choose the Right Time of Day
The golden hour, around sunrise or sunset, often provides the best lighting for ocean shots. Soft, diffused light during these times enhances colors and creates dramatic skies.
Stay Patient and Observant
Wait for the perfect moment—like a wave crashing or a dolphin jumping. Patience can lead to unforgettable shots. Keep an eye on the weather too; storms can create amazing, dynamic scenes.
Use a Tripod for Stability
A tripod ensures your camera stays steady, especially near the water’s edge or when capturing long exposures. This helps prevent blurry photos and allows for longer shutter speeds.
Experiment with Angles
Don’t always shoot straight ahead. Try shooting from ground level, above the waves, or from a high vantage point. This adds unique perspectives to your photos.
Focus on Reflections
Look for reflections off the water’s surface, like those of clouds, boats, or even the sun. These reflections can add depth and interest to your images.
Consider Post-Processing
After capturing your shots, edit them to enhance colors, adjust exposure, and remove unwanted distractions. Tools like Adobe Lightroom or free apps like Snapseed can help polish your work.
Stay Safe and Respect the Environment
Always be mindful of your surroundings. Avoid disturbing wildlife and be cautious of strong currents when photographing near the water.
By following these tips, you can create ocean photos that are not only beautiful but also meaningful and impactful.
Best Camera Settings for Beach Photography
Beach photography requires careful consideration of lighting, composition, and technical settings to capture stunning shots. Here’s a guide to optimizing your camera settings:
- ISO Setting: Keep your ISO low to maintain detail and reduce noise. A setting of 100-200 is ideal for bright conditions.
- Aperture: Use a large aperture (f/8 to f/18) to ensure sharp focus across the entire frame and create a shallow depth of field for dramatic effects.
- Shutter Speed: Opt for a fast shutter speed (1/250 sec and above) to freeze action, or slower speeds for capturing serene water movements.
- White Balance: Adjust based on the time of day. Golden hour offers warm tones, while midday light is cooler.
- Polarizing Filter: Use a polarizer to reduce glare and enhance color vibrancy, ensuring a clearer sky and less reflection.
Additional Tips
- Composition: Utilize leading lines like the horizon for a sense of direction and experiment with angles to add dynamism.
- Stability: Use a tripod to maintain steady shots, especially in windy conditions.
- Experimentation: Test settings beforehand and adjust for your specific camera type, whether it’s a mirrorless or DSLR.
- Post-Processing: Fine-tune highlights, shadows, and remove unwanted elements like tripod legs for a polished finish.
By mastering these settings and techniques, you’ll be well-equipped to capture the essence of beach photography, from vibrant sunsets to calm ocean scenes.
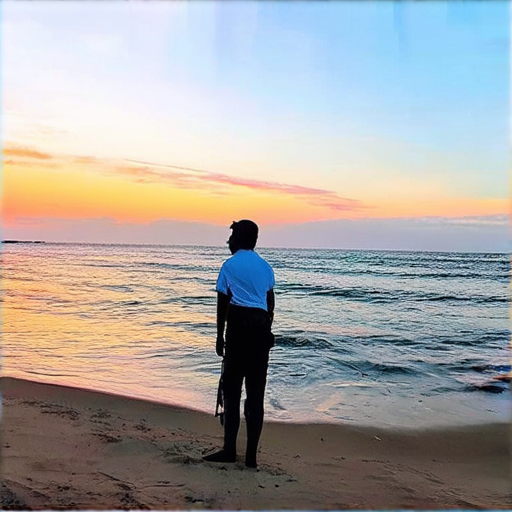
How to Make Beach Pictures Look Better
To enhance your beach photographs, consider the following tips:1. **Equipment Setup**: – Use a sturdy tripod to maintain stability, especially during low-light conditions. – Opt for a wide-angle lens to capture more of the scene, though be mindful of potential distortion.2. **Timing**: – Capture shots during the “golden hour” – right after sunrise or just before sunset – for soft, warm lighting. – Scout locations early to avoid harsh shadows and plan around the sun’s position.3. **Composition**: – Utilize leading lines such as the horizon or paths leading into the sea to guide the viewer’s eye. – Incorporate foreground elements like seashells or driftwood to add texture and depth. – Balance the foreground with the background to avoid clutter.4. **Post-Processing**: – Edit photos using software to adjust colors, remove unwanted objects, and correct exposure. – Enhance details and reduce noise for a cleaner look.5. **Additional Tips**: – Check the weather forecast to optimize lighting conditions. – Experiment with angles, such as low shots to emphasize the vastness of the beach.By following these guidelines, you can transform ordinary beach photos into stunning visual narratives.
What is Ocean Photography Called?
Underwater photography is the practice of capturing images or videos while submerged in water. It involves using specialized equipment and techniques to document the fascinating underwater world, including marine life, coral reefs, shipwrecks, and other incredible sights beneath the surface.
Methods of Underwater Photography
Underwater photography can be practiced through various means, including:
- Snorkeling: Using snorkel gear to explore shallow waters and capture images.
- Scuba Diving: Utilizing scuba gear to dive deeper and access more diverse underwater environments.
Common Subjects in Underwater Photography
The underwater world offers a vast array of subjects for photography, including:
- Marine Animals: Fish, sharks, whales, and other aquatic creatures.
- Coral Reefs: Colorful and intricate structures that are home to countless species.
- Shipwrecks: Sunken vessels that have become artificial reefs and habitats.
- Macro Photography: Close-up shots of small organisms like plankton and microscopic creatures.
Equipment Used in Underwater Photography
To capture high-quality underwater images, specialized equipment is often required, such as:
- Waterproof Cameras: Designed to handle the pressure and environment underwater.
- External Lighting: Flashlights or strobe lights to illuminate subjects in low-light conditions.
- Floats and Ballasts: To control buoyancy and ensure proper camera placement.
Challenges in Underwater Photography
Despite its beauty, underwater photography presents unique challenges, including:
- Low Light Conditions: Many underwater environments lack sufficient natural light.
- Buoyancy Issues: Managing floatation to keep equipment steady and accessible.
- Reflections and Distortions: Water can affect light and create reflections that alter image quality.
By mastering these techniques and understanding the underwater environment, photographers can create stunning and impactful images that showcase the hidden wonders of our oceans.
What is it called when you take pictures of the ocean?
When you take pictures of the ocean, it is referred to as **underwater photography**. This specialized field focuses on capturing the vibrant life beneath the waves, including marine flora and fauna, coral reefs, and other underwater phenomena. Underwater photography often requires advanced equipment and techniques to ensure optimal results, making it both an art form and a method for documenting marine ecosystems.
Related Terms:
– **Marine Photography**: A broader category that encompasses underwater photography, focusing on all aspects of the marine environment, including coastal scenes and boat photography.- **Seascape Photography**: Specifically refers to capturing the vastness and beauty of the open sea, often including the horizon and distant landscapes.Both terms are closely related to underwater photography, each highlighting different aspects of photographing the ocean.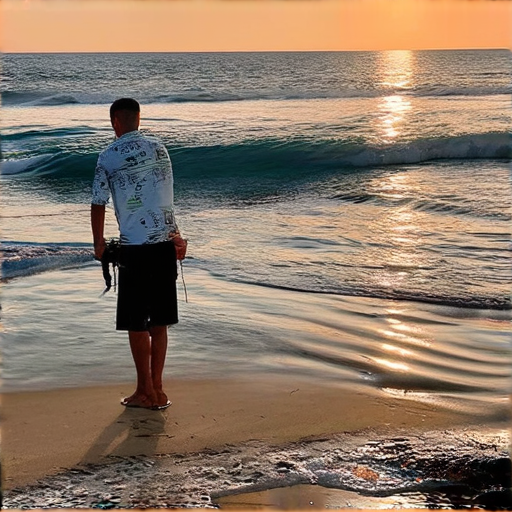
Why is Underwater Photography Difficult?
Underwater photography presents a unique set of challenges that make it a demanding skill. Here are the primary reasons:1. **Technical Limitations**: – **Water and Electronics**: Submerged environments are harsh on electronic devices. Moisture can damage sensitive components, making cameras and accessories prone to failure. – **Light Absorption**: Water absorbs light, reducing visibility and color accuracy. This limits the ability to capture true tones and vibrant hues. 2. **Visibility Issues**: – **Deeper Waters**: As water depth increases, light scatter and absorption reduce visibility, making it harder to frame subjects accurately. – **Shallow Areas**: Sand, silt, and particles in shallow waters can obscure vision, further complicating composition. 3. **Buoyancy Control**: – Divers must master buoyancy control to stay steady, as movement can blur images. Achieving this requires practice and understanding of underwater physics. 4. **Subject Behavior**: – Fish and marine life can be skittish, making it challenging to pose subjects naturally. Predators and prey often move quickly, adding to the difficulty of capturing dynamic moments. 5. **Unpredictable Lighting**: – Natural light underwater undergoes significant changes due to scattering and filtering, leading to unpredictable lighting conditions. 6. **Manual Controls**: – Many underwater cameras lack automatic features, requiring shooters to manually adjust settings in challenging conditions. 7. **Cost and Maintenance**: – Specialized gear and frequent maintenance are costly and time-consuming, deterring many aspiring photographers. These factors combine to create a challenging environment, making underwater photography a skill that demands patience, technical proficiency, and adaptability.


0 Comments