The art of capturing boat photos is a fascinating endeavor that combines technical skills with a keen eye for detail. Whether you’re a seasoned photographer or a hobbyist looking to improve your marine photography, the challenge of perfectly framing a boat in its surroundings can be both rewarding and elusive. From the glint of sunlight on the water to the intricate details of the vessel itself, there’s a lot to consider when aiming to create stunning boat photos. In this ultimate guide, we’ll explore the essential techniques, equipment, and strategies needed to master the craft of marine photography, ensuring your boat photos stand out and leave a lasting impression.
How to Take Good Pictures of a Boat
To capture stunning photographs of a boat, consider the following tips:
Preparation
- Choose the Right Equipment: Use a high-quality camera or smartphone with a good lens. Consider using a tripod for stability.
- Plan the Timing: Shoot during golden hour (sunset or sunrise) for soft, warm lighting. Avoid midday sun, which can cause harsh shadows.
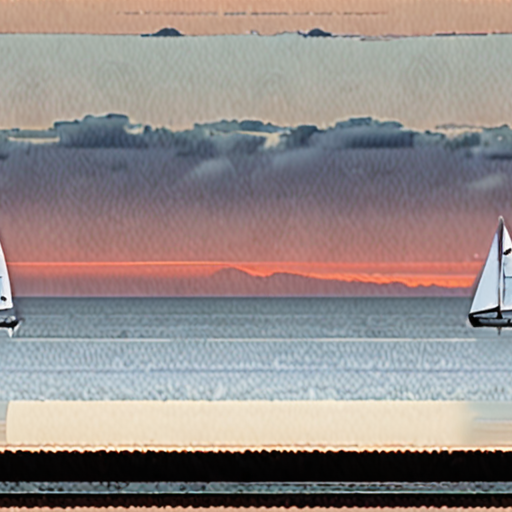
- Location Matters: Find a spot with a scenic backdrop, such as a calm ocean, dramatic clouds, or a vibrant sunset.
- Weather Conditions: Check the forecast. Avoid shooting in rough seas unless you’re aiming for dynamic shots.
- Safety First: Ensure safe conditions, especially if photographing from a moving vessel.
Composition
- Vessel Placement: Position the boat diagonally in the frame to create visual interest and lead the viewer’s eye through the image.
- Angles: Experiment with low-angle shots for a commanding presence or high-angle shots for a serene feel.
- Symmetry and Balance: Capture the boat in a balanced pose, whether stationary or under sail.
- Leading Lines: Use the boat’s lines or rigging as leading elements to draw the viewer’s attention.
- Foreground Elements: Include small details like waves, seagulls, or reflections to add depth to the photo.
Lighting
- Golden Hour: The best times are during sunrise or sunset when the light is soft and warm.
- Shadows: Use the boat’s shadow to add drama or emphasize texture.
- Reflections: Capture reflections off the water surface for a serene effect.
- Available Light: Don’t shy away from shooting during the day, especially if the light creates interesting patterns.
Post-Processing
- Edit for Color Balance: Adjust hues to enhance the mood of the scene, like cooler tones for calming vibes.
- Crop and Straighten: Remove unwanted elements and ensure the boat is centered or framed nicely.
- Sharpen Details: Enhance textures, like the boat’s woodwork or the ocean’s surface.
- Share Your Work: Upload your favorite boat photos to platforms like Sailing Photo Awards to showcase your talent.
By following these tips, you can capture breathtaking images of boats that tell a story and leave a lasting impression.
Best Camera Lens for Boating
When selecting the best camera lens for boating, consider factors like image stabilization, focal length, and environmental resistance. Here are our recommendations:
- Ultra-Wide Angle Lens: Ideal for capturing vast landscapes and wide shots of the boat and surroundings. Recommended models include the Nikon 24mm f/3.5 and the Canon EF 28mm f/2.9 II .
- Mid-Range Zoom Lens: Offers a balance between wide and telephoto perspectives. The Olympus M.Zuiko 40-150mm f/4-5.6 is a excellent choice for its compact design and variable aperture.
- Telephoto Lens: Perfect for distant subjects or action shots. Consider the Fujifilm XF100-400mm f/4.5-6.4 for its constant aperture and long reach.
- Faster Telephoto Lens: For high-speed action, try the Sony 70-600mm f/4-5.6 G Master , known for its impressive speed and performance.
Remember to check your camera’s sensor size and the lens compatibility before purchasing. Also, consider waterproof options if boating in salty or wet environments.
Optimal Shutter Speed for Capturing Moving Boats
When photographing moving boats, the ideal shutter speed depends on the boat’s speed and the desired outcome. Here’s a structured approach:
- General Rule of Thumb: Set your camera between 1/500th and 1/10,000th of a second.
- Slow-Moving Boats: For calm conditions, a slower shutter speed like 1/500th of a second can effectively capture the boat’s movement without significant blur.
- Fast-Moving Boats: For speedboats or ferries, a faster shutter speed of 1/10,000th of a second is recommended to freeze the motion and capture sharp details.
- Environmental Factors: Consider the boat’s movement relative to its surroundings, such as waves or other moving elements, which may influence the required shutter speed.
- Boat Type: Sailboats may require higher shutter speeds due to their movement, while powerboats can vary based on their speed and stability.
- Purpose of Photography: Adjust the shutter speed according to whether you’re focusing on the boat’s motion, its occupants, or the surrounding environment.
- Stabilization Techniques: Using a tripod can help achieve smoother shots, allowing for a slower shutter speed despite the boat’s movement.
Experiment with these settings and adjust based on the unique conditions of your shoot to achieve the best results in your boat photography.
How to Take Flowing Water Photos
To capture the essence of flowing water in your photographs, follow these steps for achieving that soft, misty effect:
- Adjust Camera Settings: Set your camera to a slower shutter speed of 10 seconds or more. This will allow the moving water to blur into a smooth, ethereal appearance.
- Use a Tripod: To maintain stability during long exposures, use a tripod. This ensures your camera remains steady and focused on the subject.
- Shallow Depth of Field: Experiment with a smaller aperture (e.g., f/8 or lower) to create a shallow depth of field. This will keep the foreground sharp while blurring the background, enhancing the flowing effect.
- Backlighting: Try shooting into the sunlight or against the light. This creates a dramatic effect where the light scatters through the water, giving it a misty glow.
- Composition and Angle: Capture the scene from a lower angle to emphasize the flow of the water. Consider leading the eye towards a point in the foreground to create a more dynamic composition.
- Post-Processing: In your editing software, adjust the exposure and blur effects to refine the final look. Combine multiple shots or apply filters to smooth out textures in the water.
- Timing: Shoot during early mornings or golden hours for softer, diffused light that enhances the flowing water effect.
By following these steps, you can capture the beauty of flowing water in your photos, creating a serene and visually striking image.
Camera Settings for Water Photography
For optimal results in water photography, consider the following settings and techniques:1. **Shutter Speed**: – **Fast Shutter Speeds (1/1000 sec or faster)**: Ideal for capturing action shots, such as waves or splashes, freezing the motion to create dynamic images. – **Slow Shutter Speeds (1/15 sec or slower)**: Achieve a silky, smooth effect, perfect for serene landscapes or reflections.2. **Polarizing Filter**: – Reduces glare and enhances color vibrancy, making the water appear clearer and more vibrant.3. **White Balance**: – Use manual white balance to preserve the natural colors of the water, especially under varying light conditions.4. **Aperture**: – **Large Aperture (f/8 or higher)**: Increases depth of field, allowing greater focus control and sharper details in the foreground. – **Small Aperture (f/11 or lower)**: Captures a wider depth of field, suitable for landscape shots where the entire scene is important.5. **ISO Settings**: – Choose a low ISO (e.g., 100-200) to minimize noise, especially in bright conditions. Increase ISO in low-light situations to avoid underexposure.6. **Composition Techniques**: – Utilize leading lines and symmetry to create visually appealing compositions, guiding the viewer’s eye through the frame.7. **Lens Choice**: – Opt for a wide-angle lens for broader landscapes or a telephoto lens to compress the scene and highlight subjects like boats or wildlife.8. **RAW Files**: – Capture images in RAW format for maximum post-processing flexibility, allowing adjustments in color balance and exposure.9. **Additional Filters**: – Use Neutral Density (ND) filters to balance foreground and background exposure, particularly when the sky is too bright. Consider a graduated ND filter for precise exposure control.10. **Timing**: – Shoot during the “golden hour” (early morning or late afternoon) for soft, flattering light. Be prepared to act quickly due to the rapid change in lighting conditions.11. **Image Stabilization**: – Employ in-camera stabilization or a tripod to prevent blur caused by camera shake, especially when using slow shutter speeds.12. **Post-Processing**: – Leverage editing software like Adobe Lightroom or GIMP to enhance colors, sharpness, and remove unwanted elements post-shoot.By thoughtfully adjusting these settings and applying these techniques, you can capture stunning and memorable water photographs.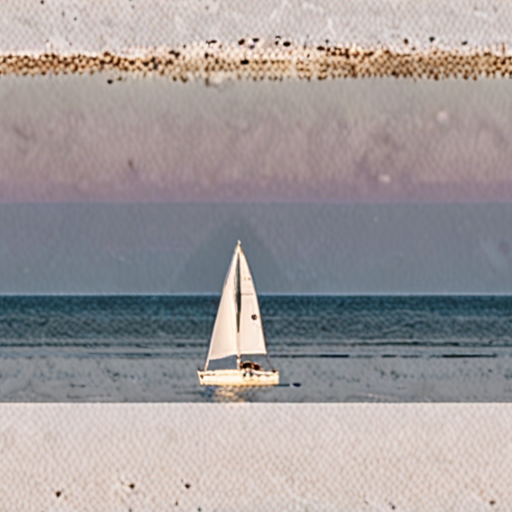
How to Adjust Shutter Speed on an iPhone
To adjust the shutter speed on your iPhone, follow these steps:
- Open the Camera App: Launch the Camera application on your iPhone.
- Explore Manual Controls: – Depending on your iPhone model, you may find manual controls under the “Options” or “Settings” menu within the Camera app. – Look for options like “Shutter Speed” or “Manual Exposure.”
- Adjust Shutter Speed:** – Use the slider or buttons to adjust the shutter speed. Slower speeds (e.g., 1/10 sec) allow more light, resulting in brighter photos but potentially more motion blur. – Faster speeds (e.g., 1/1000 sec) capture movement more sharply but may require more light.
- Use Time-Lapse Mode:** – If manual controls are limited, enable the Time-Lapse mode to achieve slower shutter speeds. – This mode is useful for capturing dynamic scenes with longer exposures.
- Experiment with Exposure Compensation:** – Adjust the exposure compensation to balance the lighting conditions with your chosen shutter speed. – Higher exposure compensations can help brighten photos taken in low-light conditions.
- Consider Third-Party Apps:** – For greater control, explore third-party camera apps like ProCam that offer advanced settings.
By experimenting with these settings, you can optimize your iPhone’s camera to capture the perfect shot in various lighting conditions.

0 Comments