Are you captivated by the beauty of the open sea but unsure how to capture its essence in perfect detail? Whether you’re a seasoned sailor or a photography enthusiast, mastering the art of scenic sailing photography can transform your shots from ordinary to extraordinary. This guide delves into the secrets of creating stunning sailing images, offering expert advice on techniques, gear, and tips to help you navigate the complexities of boat photography and seascape composition. From understanding the fundamentals of sailing to discovering the best locations for scenic backdrops, this comprehensive resource will equip you with everything needed to create memories that last a lifetime. Explore the latest trends, discover hidden gems, and learn how to elevate your photography game with professional-grade tips and tricks. Let’s embark on a journey to unlock the full potential of scenic sailing photography and bring the magic of the open sea to life through your lens.
Key Takeaways: Mastering Scenic Sailing Photography
- Optimal Lighting: Capture photos during the golden hour for soft, diffused light, avoiding harsh midday sun. Adjust for shade or use filtered light when necessary.
- Camera Equipment: Invest in a DSLR or mirrorless camera with interchangeable lenses. Use a tripod for stability, a cable release for steady shots, and an ND filter for light control.
- Lens Selection: Utilize wide-angle lenses for expansive sea views and telephoto lenses for detailed shots of sails and boat features.
- Shutter Speed: Employ fast shutter speeds (1/1000 sec) to freeze motion, adjusting slower speeds for calm water effects.
- Aperture Settings: Use larger apertures (f/8+) to isolate subjects and control depth of field, experimenting for best results.
- ISO Management: Maintain lower ISOs (100-200) for clean images, increasing as needed in low light without introducing excessive noise.
- White Balance: Adjust settings to match ambient light, especially on reflective surfaces like water.
- Composition Techniques: Apply the rule of thirds and leading lines like the horizon for dynamic compositions. Consider boat placement and symmetry.
- Technical Skills: Practice panning and focus tracking to maintain sharpness, using techniques like half-press focusing.
- Post-Processing: Reframe shots, remove reflections, and adjust histograms for enhanced image quality.
- Seascape Specifics: Use slow shutter speeds (10-30 secs) and low ISOs for blurred water effects, ensuring stability with a tripod.
- Exposure Triangle Mastery: Understand and experiment with aperture, ISO, and shutter speed interactions to refine photo quality.
By preparing meticulously, adapting to lighting and conditions, and refining technical skills, you can capture stunning scenic sailing photos that truly convey the essence of the journey.
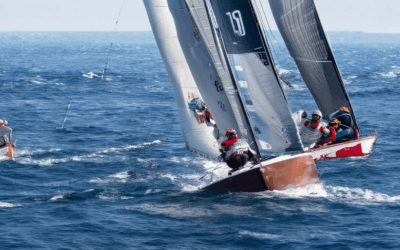
Rule 1 in Sailing
Rule 1 of sailing, often referred to as the “right-of-way” rule, governs how boats maneuver relative to each other. Here’s a breakdown of the key points:
- Same Tack : When two boats are on the same tack (both heading in the same direction), the boat on the leeward side (the one further downwind) has the right-of-way. This means the windward boat must yield to the leeward boat.
- Opposite Tacks : If the boats are on opposite tacks (one going windward and the other leeward), the boat on the starboard (port) tack has the right-of-way. This ensures that boats approaching from different directions follow a logical order of precedence.
By adhering to these rules, sailors can navigate safely and avoid collisions while sharing the waterways.
The Best Lens for Sailing Photography
For sailing photography, selecting the ideal lens is crucial to capture the essence of the open sea and intricate details of your vessel. Consider the following recommendations based on various factors:
- Wide-Angle Prime Lenses :
- Nikon AF-S DX ED VR 24mm f/3.5G II : Known for excellent sharpness and vibration reduction, this lens is ideal for wide compositions, capturing the vastness of the ocean and the boat’s proportions.
- Canon EF 24mm f/2.8 III : Renowned for its low-light performance and sharpness, this lens excels in challenging lighting conditions common during sailboat photography.
- Ultra-Wide Angle Options :
- Nikon AF-S 14mm f/2.8G : Perfect for capturing expansive scenes, allowing photographers to include more of the horizon and surrounding environment.
- Canon EF 16mm f/2.8 : Offers a slightly narrower ultra-wide angle, balancing between width and detail retention.
- Mid-Range Zoom Lenses :
- Sigma 18-35mm f/3.5-5.6 DC DN : A versatile option for those seeking a balance between wide-angle and telephoto capabilities, suitable for both distant subjects and close-ups.
- Telephoto Lenses :
- Nikon AF-S Telephoto Series : Ideal for capturing detailed shots of rigging, sails, or distant subjects, though note that these may require a full-frame camera for optimal performance.
- Considerations :
- Image Stabilization : Look for lenses with built-in stabilization to mitigate motion blur caused by rough seas.
- Weather Resistance : Essential for durability in salty and humid environments, so check for weather-sealed options.
- Camera Compatibility : Ensure compatibility with your camera type (full-frame or APS-C) as this affects focal length performance.
Each choice caters to different preferences, whether you prioritize wide landscapes, detailed close-ups, or versatility. Evaluate your photography style and equipment to select the lens that best fits your needs.
Scenic Photography Defined
Scenic photography is most commonly referred to as landscape photography . This genre focuses on capturing vast, open natural environments, showcasing their beauty and grandeur. Landscapes often include elements like mountains, forests, rivers, and wide-open fields, emphasizing the scale and impact of nature.
While terms like “wilderness photography” and “nature photography” are related, landscape photography is the broader term typically used to describe scenic views. It emphasizes the interplay of light, texture, and atmosphere to convey the essence of a location.
Thus, scenic photography is synonymous with landscape photography, a well-established genre in visual arts.
Optimal Camera Settings for Boat Photography
For boat photography, achieving the perfect shot requires careful consideration of various factors, from lighting and equipment to composition and post-processing. Here’s a structured approach to help you capture stunning images:
Lighting
- Golden Hour : Shoot during early morning or late afternoon to utilize soft, diffused light, minimizing harsh shadows.
- Avoid Midday Harsh Light : Steer clear of direct sunlight to prevent overexposure and flat lighting.
Camera Equipment
- DSLR or Mirrorless : These are ideal due to their versatility and sensor quality.
- Lens Selection : Use a wide-angle lens for broader scenes or a telephoto for detailed shots of the boat or subjects.
- Image Stabilization : Ensure your lens has stabilization to mitigate motion blur from the boat’s movement.
Shutter Speed
- Fast Shutter Speed : Aim for 1/1000 seconds or faster to freeze motion effectively. Adjust based on water conditions; slower speeds may work in calmer waters.
Aperture
- Larger Aperture : Use f/8 or higher for shallow depth of field to isolate subjects. Experiment to find the best balance for your scene.
ISO Settings
- Balanced ISO : Start with lower ISOs for minimal noise. Increase ISO as needed for low-light conditions, up to 12800, leveraging your camera’s capabilities.
White Balance
- Adjust for Ambient Light : Use incident light metering or preset modes to match changing light conditions, especially on reflective surfaces like water.
Composition
- Leading Lines and Rule of Thirds : Utilize the horizon as a leading line for dynamic compositions. Frame subjects thoughtfully within the frame.
Technical Tips
- Panning and Tracking Focus : Practice panning to keep subjects in frame while moving. Use techniques like half-press focusing to maintain sharpness.
- Focus Management : Use focusing aids or pre-focus techniques to ensure sharpness despite movement.
Post-Processing
- Crop and Perspective Adjustment : Reframe shots if necessary and adjust perspectives to enhance composition.
- Remove Reflections : Use editing tools to eliminate unwanted glare from water or boat surfaces.
Accessories
- Tripod : Essential for stability, especially on a moving boat.
- Cable Release/Remote : Helps avoid camera movement during shoots.
- ND Filter : Useful for controlling light during bright conditions or capturing long exposures.
By considering these factors and testing your setup, you can optimize your boat photography to capture vibrant, dynamic shots that reflect the essence of your journey.
Best Camera Settings for the Sea
To capture stunning seascapes, consider the following camera settings and tips:
- Use a Tripod : Essential for stability, especially for long exposures. A tripod ensures your camera remains steady, even with rough waves.
- Slow Shutter Speed : A slower shutter speed (e.g., 10-30 seconds) blurs moving water, creating a smooth, ethereal look.
- Low ISO : Keep ISO low (100-200) to avoid noise and allow more light capture during long exposures.
- Small Aperture : Use a larger f-number (e.g., f/8-f/16) to increase available light and enable longer exposures.
- White Balance : Automatic settings work well, but manual adjustments may be necessary for specific lighting conditions.
- Focusing : Focus carefully to ensure sharpness, especially around the horizon and distant subjects.
- Composition : Utilize leading lines like the horizon for composition, applying rules of thirds or golden ratio for balance.
- Post-Processing : Adjust histograms for exposure balance and apply noise reduction to enhance image quality.
Consider additional tips:
- Check the weather forecast to plan for optimal lighting conditions.
- Be mindful of tide levels and wave patterns to frame your shots effectively.
- Use a polarizing filter to reduce glare and enhance color vibrancy.
- Golden hours (sunset and sunrise) offer soft, warm lighting ideal for seascapes.
Understanding the Three Key Settings in Photography
The three primary settings in photography—aperture, ISO, and shutter speed—are essential for controlling light and achieving the desired image quality. These settings work together to create the perfect exposure, forming what is commonly referred to as the “exposure triangle.”
1. Aperture
Aperture refers to the size of the lens opening, measured in f-stops. It determines how much light passes through the camera and influences: – Depth of field (how much of the scene is in focus) – Low-light performance – Background blur (bokeh)
A smaller aperture (higher f-stop) increases depth of field, while a larger aperture (lower f-stop) reduces it, allowing more light to enter the sensor.
2. ISO
ISO (International Organization for Standardization) measures the sensitivity of the camera’s sensor to light. A lower ISO reduces noise but requires more light, while a higher ISO increases sensitivity and allows for faster exposures in dim lighting. However, higher ISOs can introduce grain (noise), particularly in low-light conditions.
3. Shutter Speed
Shutter speed controls how long light is allowed to hit the sensor. A faster shutter speed (e.g., 1/1000 second) freezes motion and captures fleeting moments, while a slower speed (e.g., 1/30 second) allows more ambient light to be captured, ideal for static subjects or low-light scenes.
Examples and Best Practices
- Use a wide aperture (low f-stop) for macro shots or to isolate subjects.
- Increase ISO when shooting in dim lighting or fast-moving subjects.
- Adjust shutter speed to freeze motion or capture dynamic scenes.
By mastering these three settings, photographers can experiment with creative styles and achieve professional-quality results.
Learn more about photography techniques or explore our winners’ gallery to see these settings in action.
Conclusion
Understanding and effectively adjusting aperture, ISO, and shutter speed are foundational skills for any photographer. With practice, you can unlock the full potential of your camera and take stunning photos.

0 Comments